top of page


means Check Mate to the inconvenience
of dropped and misplaced plectrums.

Leave it on and make the music a part of you.
A sound solution to dropped and misplaced plectrums.
Change from finger picking to strumming style in an instant.
The ultimate plug for the plectrum black hole.
Be that player with PlecMate.


Product design © 2023 by PlecMate.
About
ABOUT

Upon starting a Mobile Guitar Tutoring Business 5 years ago I made it my goal to be as organised and as efficient as I could possibly be. One concern I had was the availability of a plectrum for each class. Having played for over 30 years, I was well aware of how easy it is to misplace or lose them. So over a lengthy period of time I developed a device that quite frankly, I would be lost without, PlecMate. In fact I found the device so useful I felt that I should share the device with others. The benefits of using PlecMate are numerous. So give it a try, you'll love it!!!!
Features
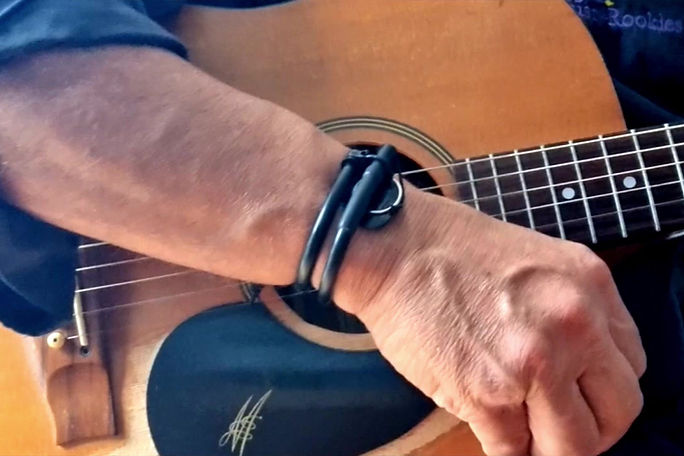
How To Fit and Use


The configuration your PlecMate arrives in is the configuration to be used when fitted.
1. Remove the supplied plectrum, unclip the two fastening clips and the elastic support strap.
2. Wrap PlecMate around your wrist and re-fasten both clips to achieve a snug fit.
3. You might like to have someone help you with this next step. Bring the elastic strap over the top of the clip then back underneath and loop over the PlecMate end.
To use PlecMate, remove the plectrum from its holding ring, unfasten the top clip and pull the retaining cord out to the desired length. Lock the cord in place using the slots on the end fitting.
Projects

How to Customize or Replace Your Plectrum
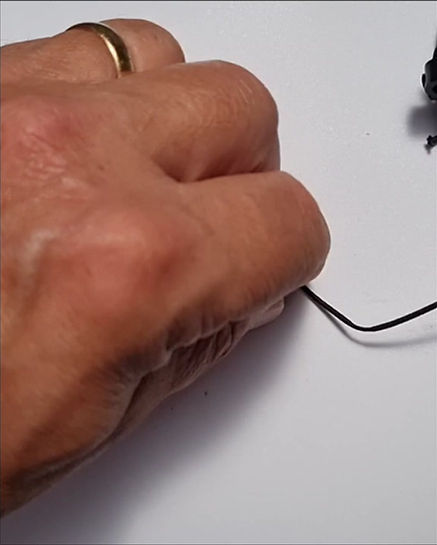
1. Firstly drill a 1.5mm hole in the very top of the new plectrum.
2. From your existing plectrum, cut the retaining knot from the cord and remove the plectrum.
3. Using the supplied thread, feed the open end through the 1.5mm hole pre-drilled in the replacement plectrum.
4. Feed the cord through the loop in the thread and pull through the replacement plectrum. Tie a knot in the cord to retain the plectrum. Trim to suit.
Contact
bottom of page